Hello. This is Onogi from the design department.
This is the second DIY post following last year's paper doll article .
Very occasionally, I make accessories as a hobby. I don't like wearing accessories, so I just make them, but I often search for accessories on Pinterest to find ideas. I often see accessories made of "wood" and "resin," and I was curious about how they were made, and by chance, I found a YouTube video from overseas that explained how to make them.
Also, my daughter is now at the age where she starts playing princesses and has started to like cute and sparkly things, so I decided to take this opportunity to make her a ring.
This was more difficult than I expected and required a lot of trial and error, but I was so happy when I finished it that I'd like to share how it went.
Tools and materials.
So, the first thing I did was ask my daughter what kind of ring she would like.
Me: "I'm going to make a ring out of wood and a clear stone. What kind would you like?"
Daughter: "It's pink and has flowers in it. I don't need a tree."
I was told that I didn't need a tree, but I didn't want one because it would be pointless. I could dye the resin pink, but the problem was the flowers. I went around the flower shops in Shinjuku hoping to find some dried flowers that would fit on the ring, but I couldn't find any.
After doing some research, I found out that there is something called "dried flowers for nails." However, most nail supply stores are membership-only, so I went to "Okadaya," which sells clothing accessories. And there they were! They weren't for nails, but they were "dried flowers for resin." The size was just right. Apparently resin accessories are popular among some girls, and they seem to have a relatively wide selection of such accessories. That's a relief for now.
So, here are the tools and materials I used.

Materials for the rings: driftwood, resin, and dried flowers. Various saws and files for processing. Scales for weight, plastic cups, etc. I forgot to take a picture, but an electric drill is also needed to make holes in the rings.
Now, let's take a look at the actual manufacturing process.
1. Roughly cut the wood
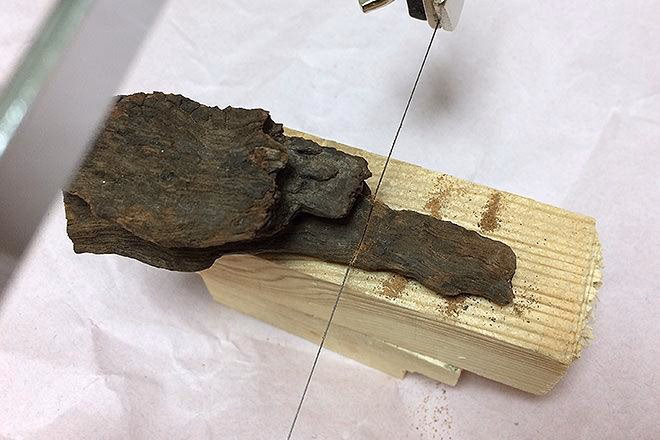
First, I cut the driftwood to a roughly appropriate size. I chose driftwood because I felt that if I used beautiful wood, it would look a bit like a processed product, and when I encased it in resin, I thought that the unevenness that reminded me of mountains would be beautiful.

The sides are scraped off with a rough metal file. Driftwood is very uneven, so we scrape off the sides and shape it into a block to make it easier to work with later. We leave the top part, where we will pour the resin, as it is, as we want to make the most of the wood's texture.
2. Coat the wood with resin
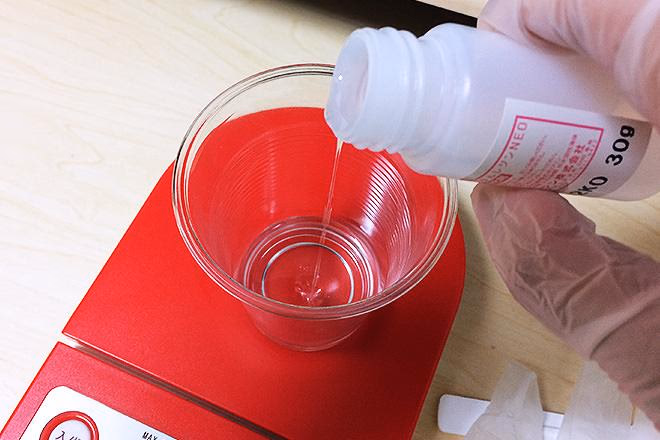
Next, mix the resin. Resin is a two-part mixture, separated into a base agent and a hardener. The important thing is to mix it in a 2:1 ratio without any deviation! For this reason, it is best to be able to measure to the nearest 0.1g (a scale with a 1g unit is fine). Any deviation will cause the resin to harden improperly. Stirring thoroughly will also help prevent improper hardening.
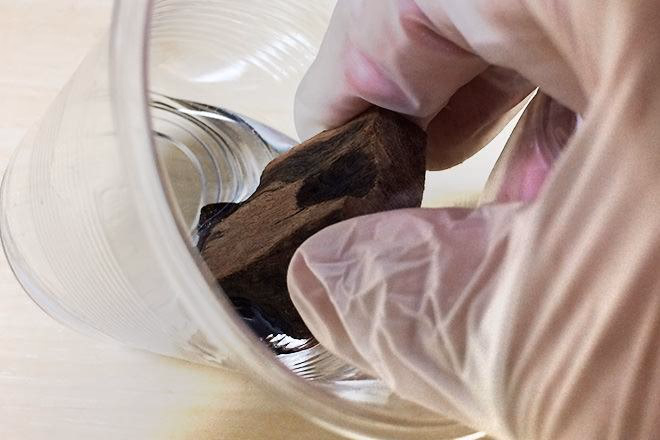
The driftwood is soaked in resin. The purpose is to harden the surface and coat it. The reason will be explained later.
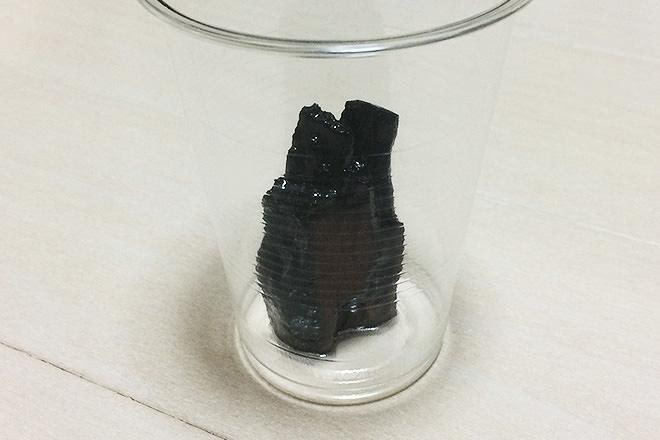
Transfer to another cup and set aside, making sure not to tip it over.
And after 48 hours... it has completely hardened. It is now smooth. (The hardening time of resin varies depending on the manufacturer and product.)
3. Determine the overall tone with colored resin
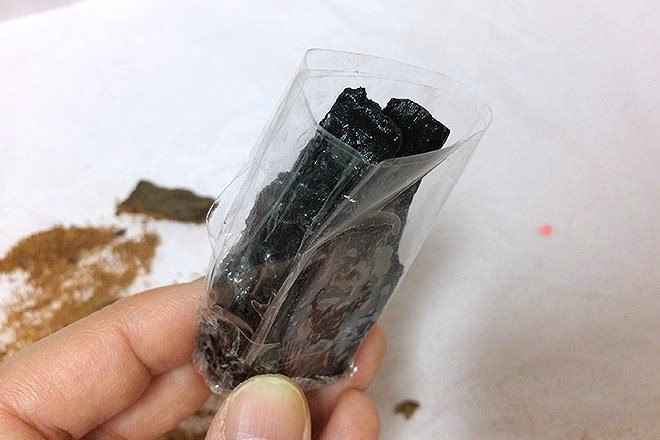
Since we will pour the colored resin in here, wrap it around with a large piece of cellophane tape. Wrap the bottom part in several layers to prevent the resin from leaking. If you cut and paste an unused Tupperware or clear case, the finish will be even nicer.

After mixing the two resin components well, mix in the resin colorant. Be careful not to add too much colorant, as this can cause poor curing.
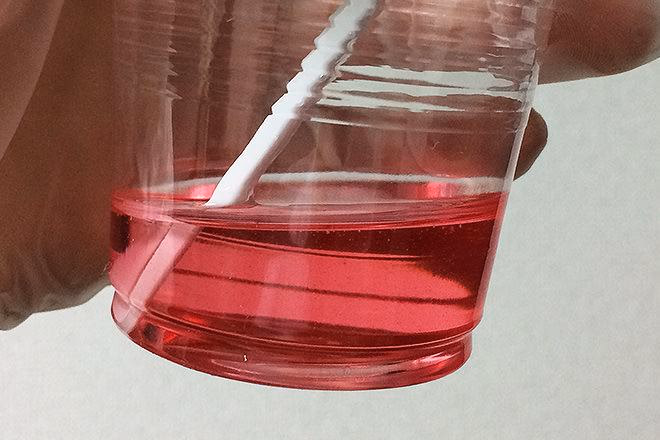
When you stir, a lot of air bubbles will form. Resin accessories are a battle against these "air bubbles." If there are too many air bubbles when it hardens, the transparency will be lost and it will be ruined.
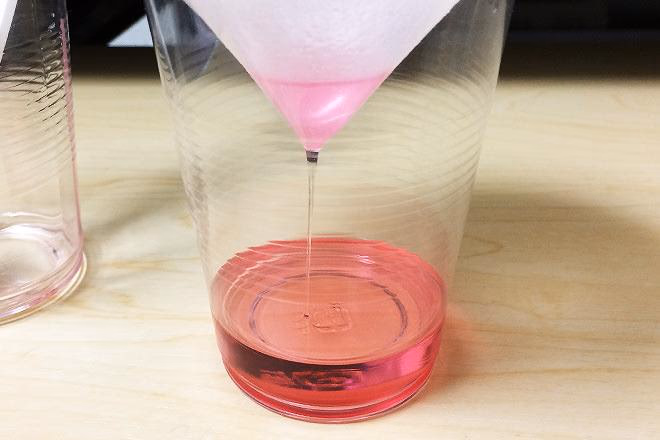
So we put oil filter paper on the cup and filter the resin. This removes the air bubbles and makes the resin clean.
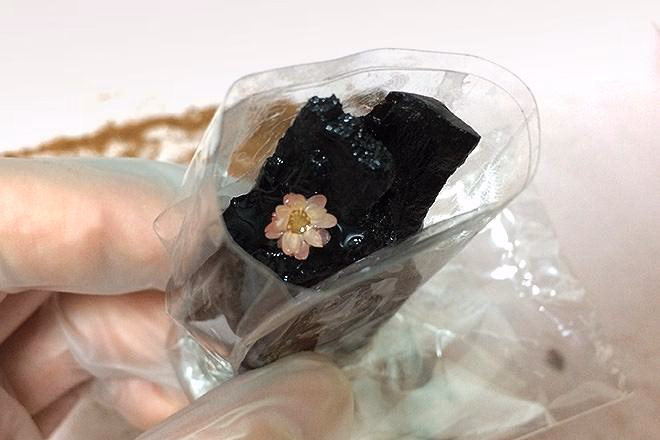
Place the flowers on the driftwood. Pour colored resin into the driftwood, but if the flowers look like they might float, you can temporarily fix them in place with glue at this stage, or you can glue them in place with resin beforehand. In this case, the driftwood was very uneven, and the flowers fit nicely into the unevenness, so there was no need to do that.
The pictures in this article are starting to become more and more girly. I'm a bit worried about my image.
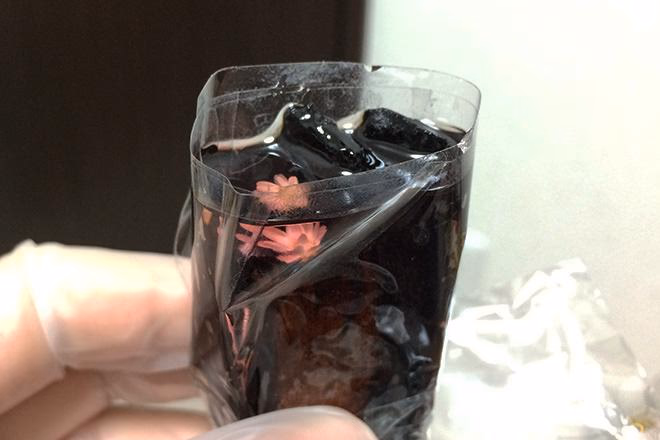
I poured in the colored resin. I wrapped it all over with cellophane tape so there was no need to worry about the resin leaking out. The reason I coated the driftwood with resin beforehand is because the wood itself contains air, so if I poured the resin in as is, air bubbles would float up. This was an extra step to prevent that.
As usual, I'll leave it here for 48 hours....it takes time.

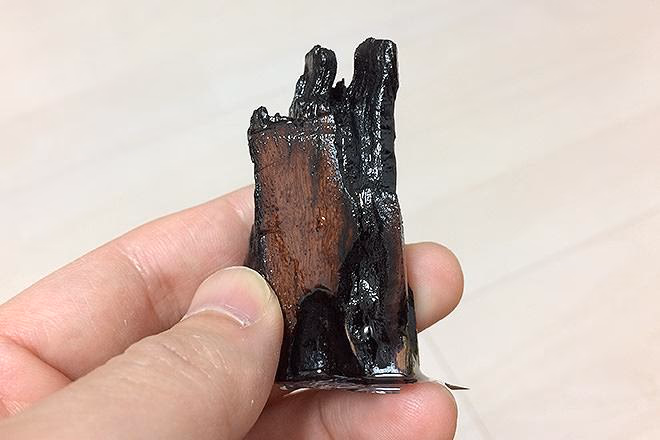
After hardening, I removed the cellophane tape and used a metal file to remove any unevenness around the surface to make it easier to work with. Metal files tend to get clogged easily, so it's more efficient to remove the shavings with a metal brush. Even at this stage, it looks like a beautiful object, and I really like it.
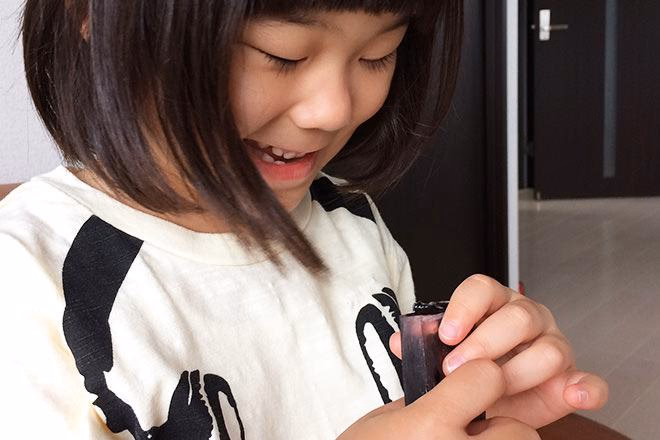
My daughter found me. She probably didn't understand, but when I told her, "I'm making a ring," she smiled. When my daughter laughs, her jaw lurches a little.
4. Drilling holes
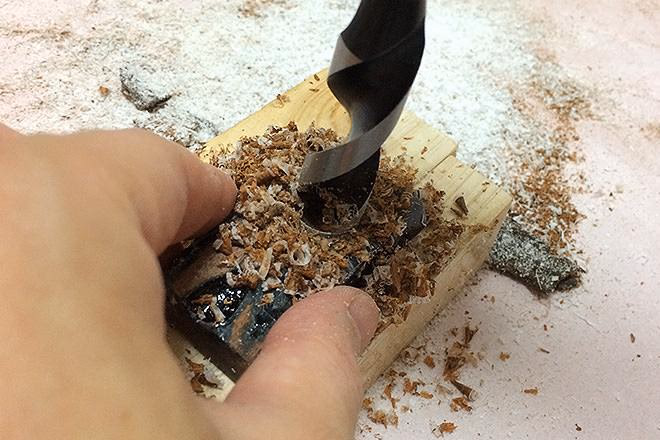
I measured my daughter's finger size in advance and used a drill of the appropriate size to make a hole for her finger. Driftwood is incredibly hard... Maybe it's just the type of wood. Anyway, this was the most difficult part.
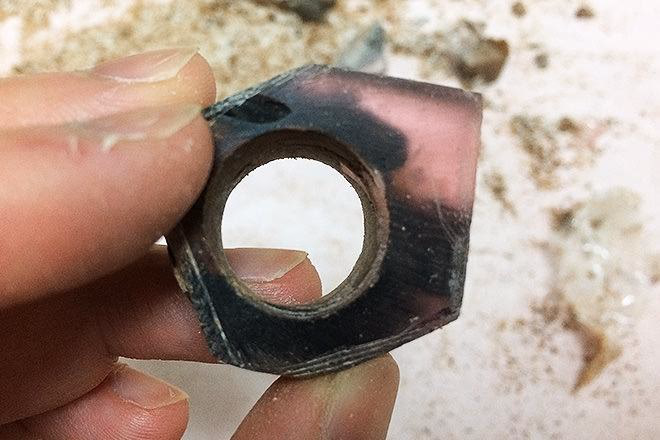
Roughly cut off the unnecessary parts around the ring with a saw. Trim it up to this size. It's starting to look more like a ring.
5. Shape the design to your liking
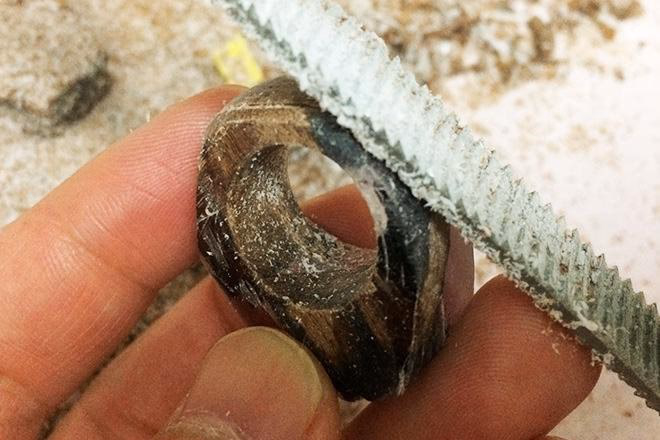
From here on, it's all about the steady work. Little by little, I get closer to the design I have in mind. I roughly smooth it out with a metal file, and occasionally use a finer one to make fine adjustments.
I made the arrangements while looking at the flow of the wood grain, but I was generally able to create the shape I wanted.
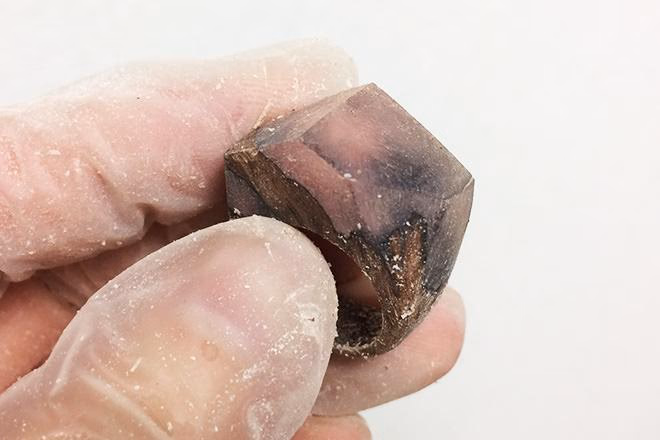
6. Just polish it!

Now comes the fun part! Sand the wood with sandpaper from #100 to #2000 in order. The more you sand it, the more transparent it becomes and the more glossy the wood becomes.
Sanded down to #2000. Still cloudy.
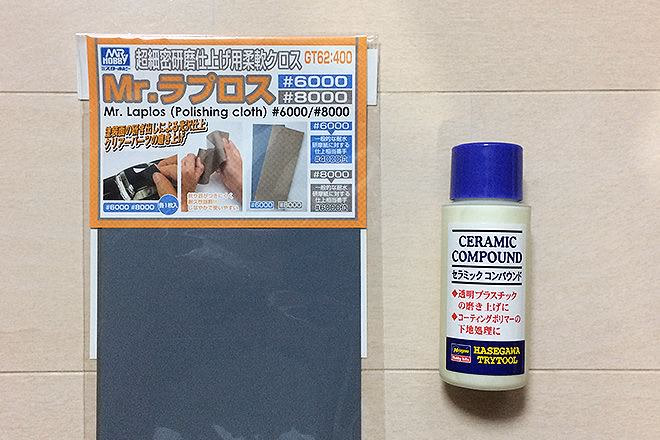
Here are the god tools! "Mr. Lapros" and "ceramic compound". Use the Lapros to sand the surface even finer, then apply a little compound to a fine cloth and polish it.
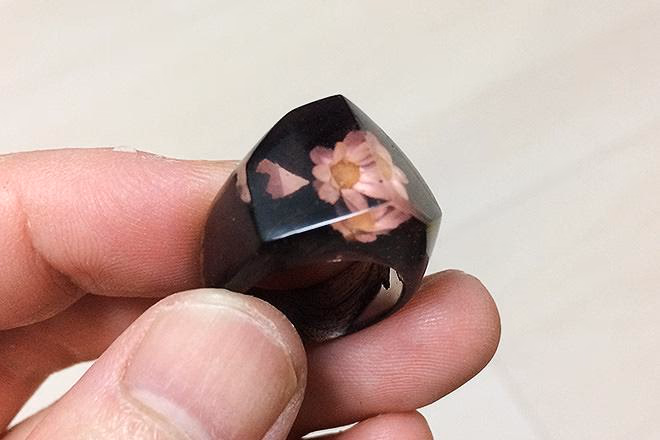
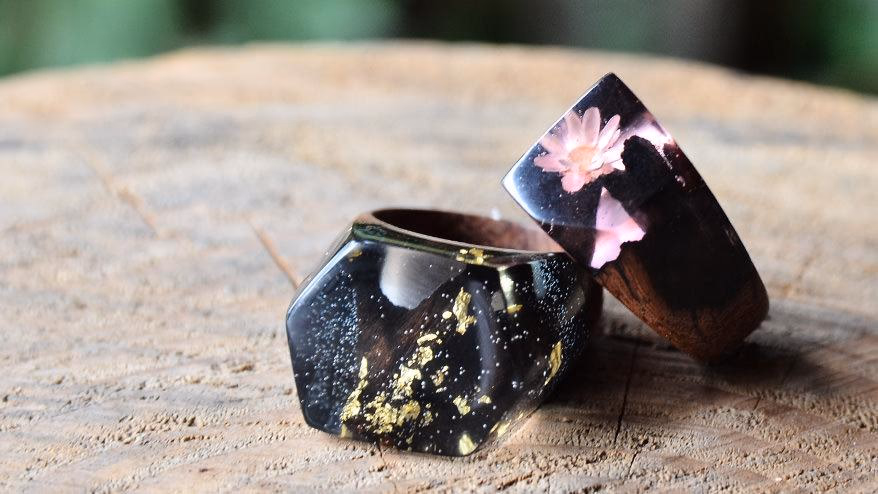
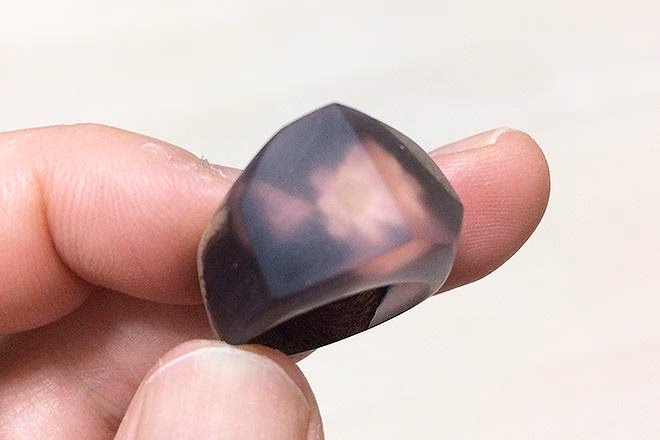
Finished! Beautiful!!
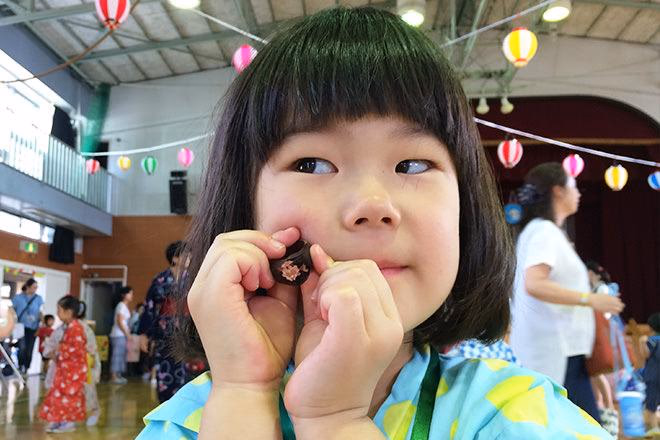
A present for the kindergarten summer festival. My daughter, who is preoccupied with the summer festival, doesn't look very happy... Please give a smile to her hard-working father.
What do you think? This article is long! That's how much work it took. I made this for my daughter with flowers and pink as the motif, but I think you can make various designs with things to encase inside, wood, coloring, etc.
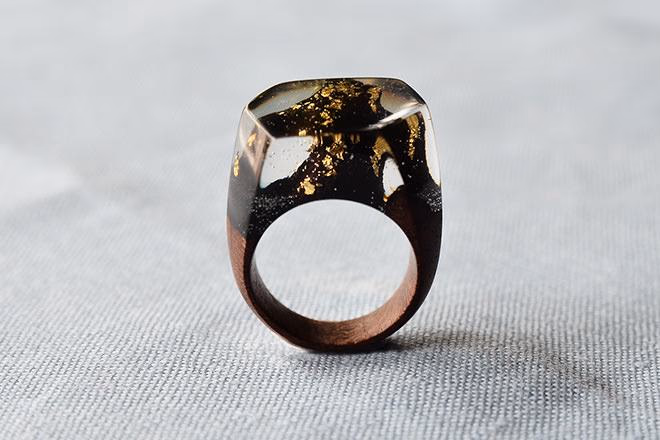
The resin part is a two-layer structure of dark blue and clear. The driftwood mountain-like design is sprinkled with gold leaf.
When making this accessory, I really felt the importance of tools. For example, in the sandpaper process, I used more than 10 sheets of sandpaper ranging from #100 to #2000 to polish the piece in small increments, but if I was too lazy and only used three sheets of sandpaper, such as #100, #500, and #2000, scratches would remain forever.
If you don't have the tools to put in the effort, you won't see results. The tools I used to make this accessory were quite expensive, and to be honest, it would be much more economical to buy a similar accessory, but I had so much fun and learned so much that I didn't even mind the expense. After all, it's a one-of-a-kind item, and my daughter is happy with it.
It was so difficult that I can't really say I'd recommend it to everyone, but I think that if you use only resin, it's easy and fun to encase all the things you like in it and create original accessories and objects.
If you have the opportunity, please give it a try!

モノサスアーカイブ