早いもので、ものさすサイトで日めくり投稿がはじまってから、 5ヶ月が経ちました。
モノサスの今をお伝えしようと、スタッフが日替わりで記事を投稿していますが、そこで重要となるのが写真です。
自分の伝えたいことを、写真でもっとうまくお伝えしたい...
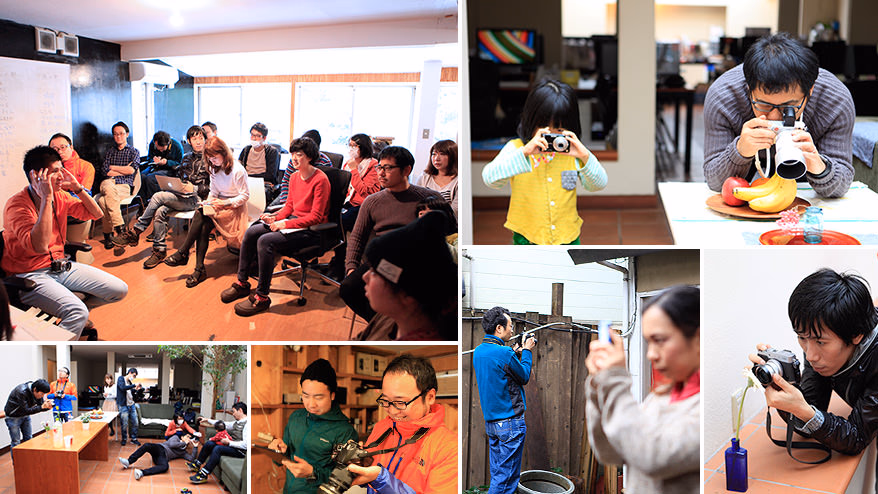
そんなことを多くの人が感じていたおり、カメラの基本的な使い方や構図を学べる「カメラ講座 - 初級編 - 」がモノサスで開催されることとなりました。カメラの使い方について、プロのカメラマンから直々に教わるチャンス!ということで、私も意気込んで参加しました。
今回は、カメラ講座で学んだこととその成果を、当日の様子を振り返りながらご紹介したいと思います。
カメラ講座 初級編
始まりは 1 日の流れの確認です。
今回のカメラ講座は、カメラの使い方を知る前と後で写真がどのように変化するか、参加者が体感しながら学べるように、午前(実践→講義)と午後(講義の実践)の2部構成となっていました。
講師にお迎えしたのは、阿部昌也さん。
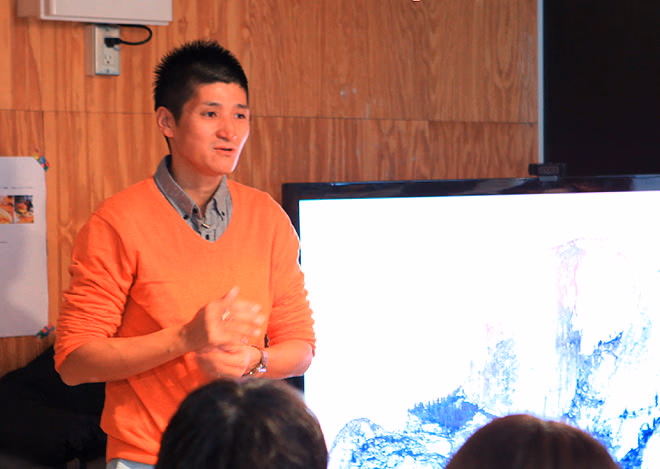
モノサスがよくお世話になっているカメラマンさんで、車やフードといった物撮りから、人物、風景まで、マルチで撮影されています。
関西人の方らしいユーモアたっぷりのご挨拶をいただいたのち、早速、実技がスタートしました。
〜 午前の部 〜
まずは、今の自分流で撮ってみよう!
まずは 30 分間、各自が自分の知見や感覚をフル動員させて、各々モノサス内を撮影します。
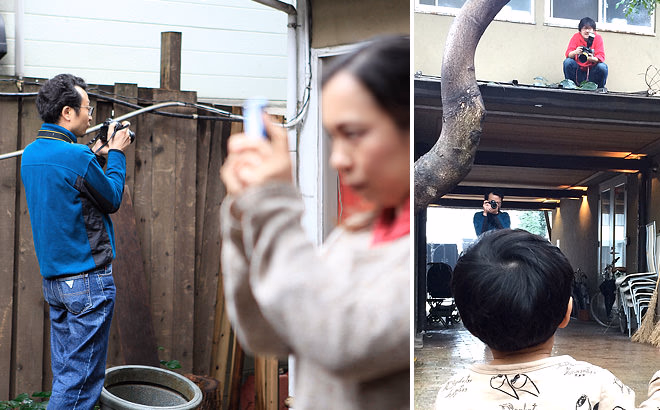
みんな真剣な眼差し。ビビッときたシーンをカメラに収めていきます。
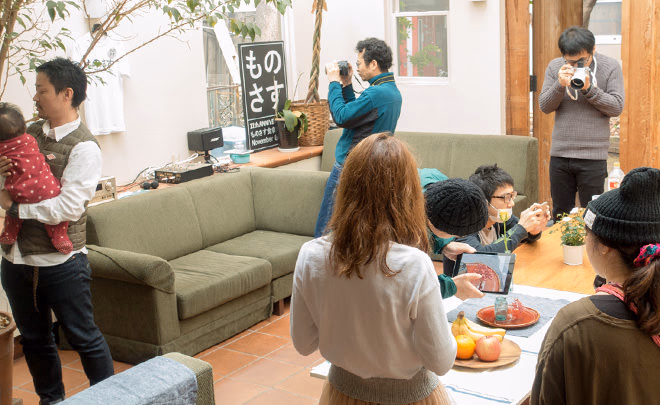
講評会
撮影した写真を通してカメラの使い方を学ぶ
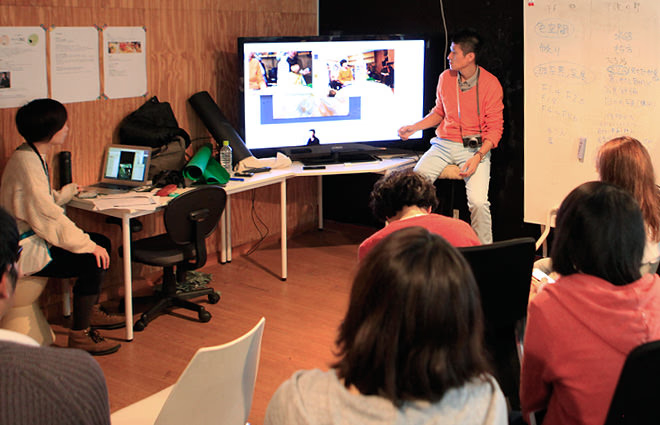
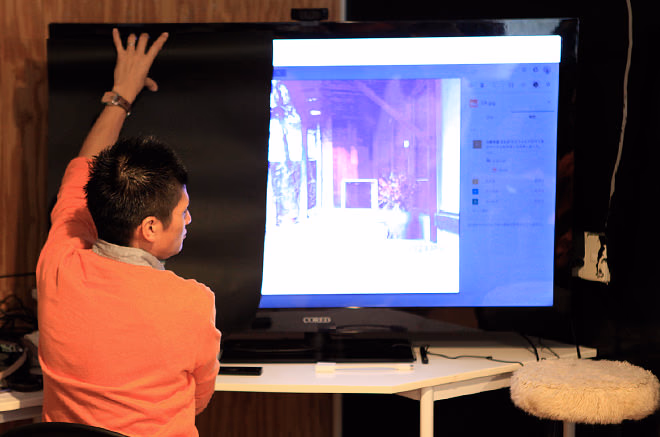
30分間の撮影のあとは、講評会の時間です。
ひとりひとり撮影した写真をモニターに映し出して、阿部さんにコメントをもらいました。貴重なフィードバックをいただくなかで特にポイントとなった4点を、つづけてご紹介します。
カメラの基本:
被写界深度・露出補正・トリミング・構図
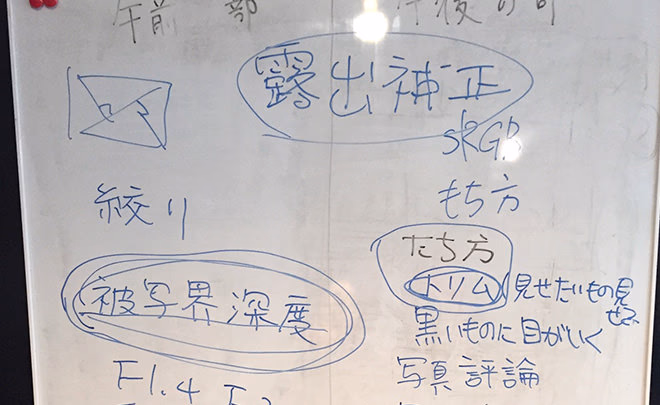
被写界深度
手前から奥へ、ピントがあう範囲、というと分かりやすいかもしれません。被写界深度は、レンズを通る光の量を表す「絞り値(F値)」に応じて変動します。
F値の値が大きければ「被写界深度が深い」ということになり、広い奥行きの範囲にピントが合った写真となります。逆に、F値を小さくすると「被写界深度が浅い」こととなり、ピントの合う奥行きは狭く、まわりはぼやけた写真となります。
露出補正
阿部さんが撮影中にもっともよく使う機能の1つが、この露出補正だそうです。
値は±で表され、−マイナス補正をすると画面全体が暗くなり、逆に+プラス補正をすれば明るくすることができます。黒を強調したいときやモチーフをシルエット的に捉えたいときは−補正、逆光のときなど撮りたいところが暗くなってしまう時は+補正を使うと効果的ということでした。
露出補正の例

左から、「−マイナス補正」「デフォルト」「プラス補正」
トリミング
トリミングは、午前中に撮影された写真のもっとも多くにあてはまる改善ポイントでした。
例えば下の写真。
画面右側の整然と並んだ線の組み合わせやが美しい写真ですが、左側とのコントラストや写り込んでいる要素の多さがあり、視線が迷われた方もいらっしゃるのではないでしょうか。
それを、思い切って右側の約半分までトリミングしてみます。
モニター越しではありますが、要素が絞られすっきりとしたことで、撮りたかったものがダイレクトに伝わるようになったと思いませんか?
このように、他の参加者の写真にも次々とトリミングの手が入りました。相手の心を撮りたかった写真については、表情やしぐさに焦点をあてて思い切ったトリミングをすると、ぐっと伝わるようになりました。
構図のコツ
画面の対角線とその直角線の交点に見せたいものをおくのがポイント。意識すると、画面に映る要素も削られてきます。

構図の基本。赤い◯の部分が意識するポイント
ランチタイム
午前の講評会を終えたところで、そろそろお腹の空く時間です。
この日のメニューは Arms の肉厚で野菜たっぷりの美味しいバーガー。
ここで待ってました ! とかぶりつくのも良いですが、今日はカメラ講座。つい先ほど受けた講義を思い出しながら「食べるものを撮るチャンス」とカメラを構える姿がありました。
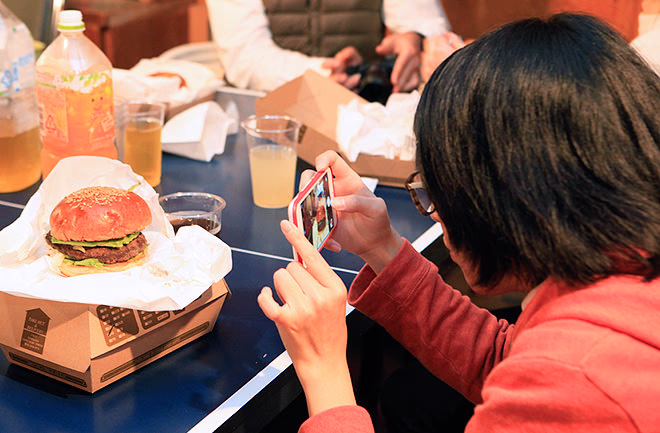
バーガーをきちんと箱の上にセットして熱心に撮影する田中。一方、奥ではカメラ談義に花が咲いている模様です。

阿部さんも一緒にランチタイム。食事中もカメラ談義に花が咲きます
〜 午後の部 〜
午前中に得た知識をもとに、撮影再チャレンジ
午前中の講評会で学んだことを意識して、再び撮影に入ります。スマホの人は画面構成を中心に、一眼カメラの人は被写界深度、露出補正も考えながら撮影に挑みました。
では実際に、講評会の前と後で写真はどのように変化したのでしょうか?
今回はひとつのモチーフにこだわって撮影を続けた、河原崎の写真を例に見てみましょう。
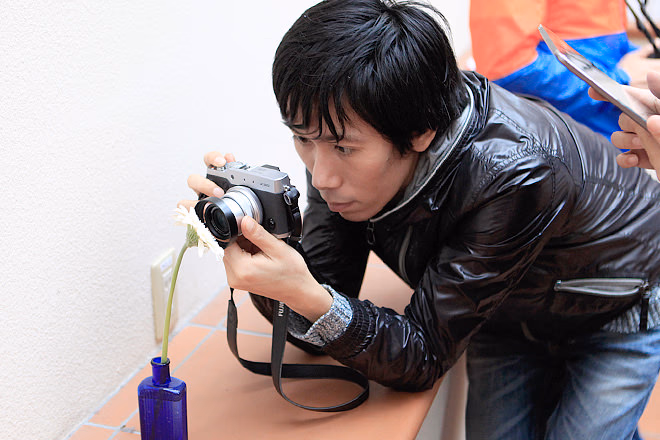
お気に入りのカメラ FUJIFILM X30 を手に、花の接写にチャレンジする河原崎(クリエイティブ部 デザイナー)
before:午前
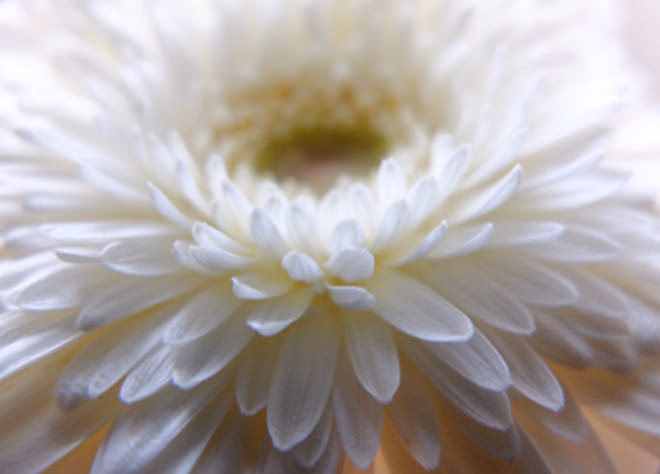
絞り値:f/2.0、シャッタースピード:1/60秒、ISO:320、露出補正:+1.7、焦点距離:7mm( FUJIFILM X30)
after:午後
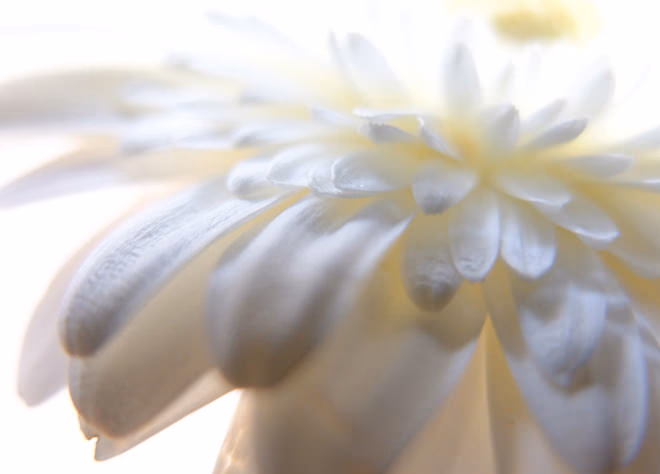
絞り値:f/2.5、シャッタースピード:1/30秒、ISO:250、露出補正:+1、焦点距離:7mm ( FUJIFILM X30)
午前中の段階では、「見せたいところは画面の真ん中に」と考えていたという河原崎。
やりたかったのは接写、見せたかったのは白の世界観でしたが、実際には花の中心部分と、画面の下半分を占める影のエリア、左上・右下に写り込んだ黒い影が目立っています。
講評を受けたことで午後はまず、自分の撮りたい世界観をより意識するようになったとのこと。白をもっと豊かに表現するために、自然光がたっぷり入る場所へ移動。
前半より絞り値やISO、露出補正などのカメラ設定の値が、暗いものを明るく撮るという傾向になっていないのはそのためです。
構図は教わったコツにならい、見せたいものを画面の中央からずらしました。
また午前の写真では一番目立ってしまっていた、色の濃い雄しべ・雌しべの扱いは難しいところ。できれば白い世界から外したいけれど、入っていないと花のどの部分を撮っているのか分からなくなってしまいます。そのネックを、明るい世界に明暗を抑えた状態でさりげなく収め、さらにピントを調整してぼかすことで、バランスのとれた画面づくりに成功。午後は表現したかった世界観を、だれもが頷くかたちに仕上げることができました。
同じモチーフでも、カメラの使い方、撮影のコツを知ることでここまで写真の説得力は変わってくるということを、実践を通して学ぶことができました。
その他、今回のカメラ講座の撮影例を一部ご紹介します。
作品紹介(撮影例)
撮影例01 : 林 隆宏(代表)
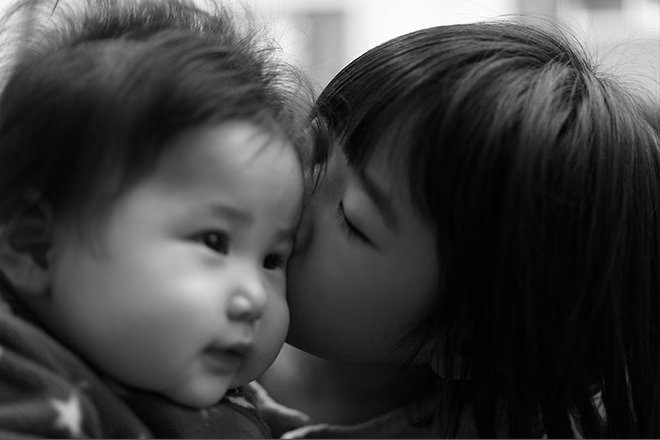
絞り値:f/1.4、シャッタースピード:1/200秒、ISO:400、露出補正:±0、焦点距離:52mm
子どもに接近し、粘り強くシャッターチャンスを待った姉妹の写真。ピントを右側のお姉さんの表情に合わせることで、お姉さんらしいしぐさや優しさへ焦点が当てられたドラマチックな1枚となりました。
撮影例02 : 林 奏(かなえ4歳・林の娘)
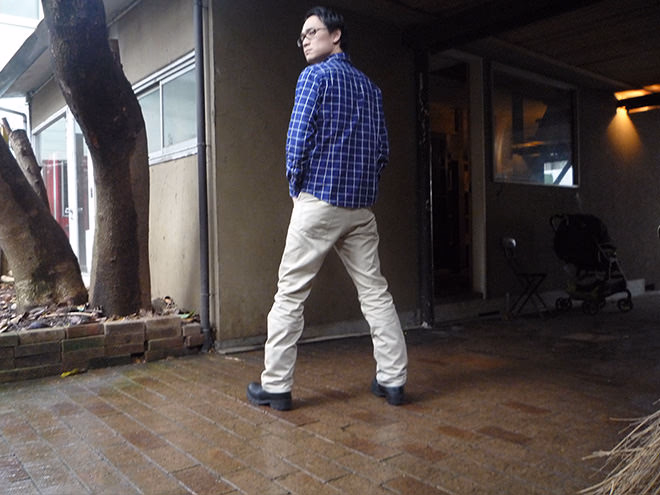
絞り値:f/3.3、シャッタースピード:1/30秒、ISO:400、露出補正:-0.33、焦点距離:30mm
一方こちらは、子どもの目線で捉えたモノサスのデザイン部部長・小野木。子どもの低い目線から大人をとらえると、こんなにも大きく見えるのですね。目線の高さの違いで世界が変わることが分かるおもしろい写真です。
撮影例03 : 松永 悟(クリエイティブ部)
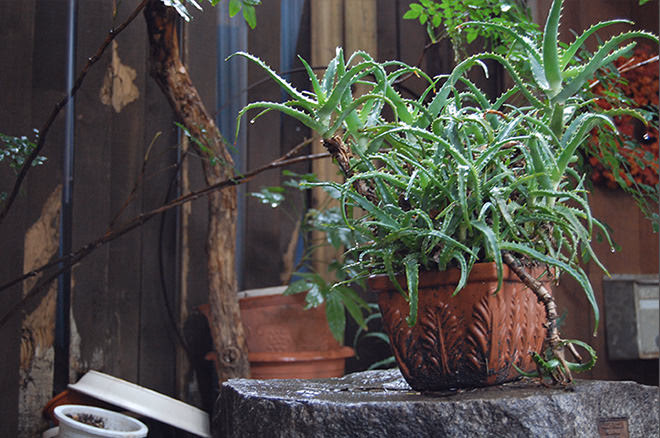
絞り値:f/5.0、シャッタースピード:1/30秒、ISO:800、露出補正:-0.67、焦点距離:57mm
中庭の異様なまでに密集して育ったアロエを、絶妙なバランスで捉えています。構図は上で紹介した「構図のコツ」のとおり。背景に淡くかかったぼけも効いています。
撮影例04 : 山内 真(プロデュース部)
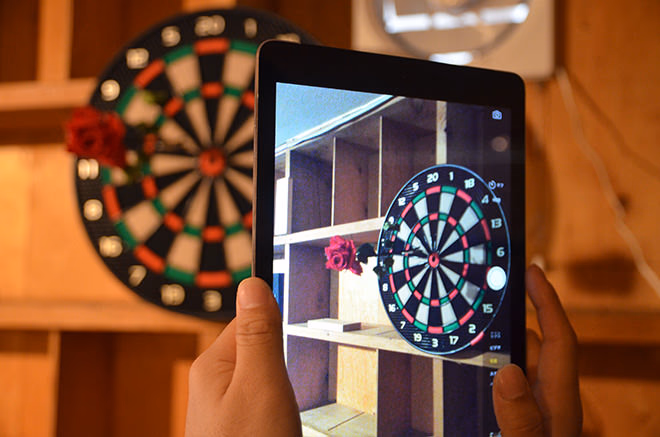
絞り値:f/3.3、シャッタースピード:1/30秒、ISO:2000、露出補正:±0、焦点距離:46mm
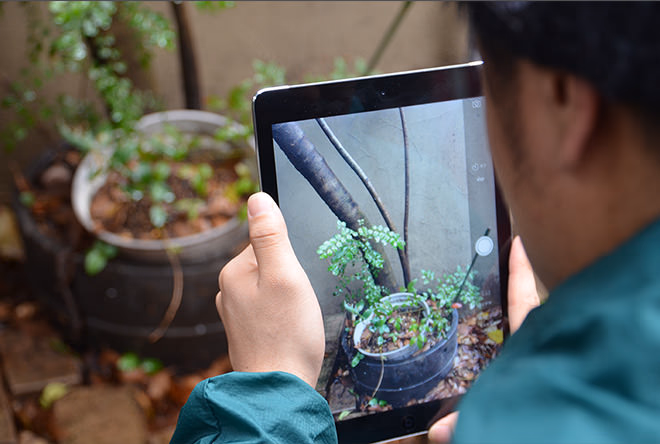
絞り値:f/4.0、シャッタースピード:1/30秒、ISO:400、露出補正:±0、焦点距離:45mm
仲間がiPadで写真を撮る姿を後ろから撮った連作で、山内らしい視点のユーモラスな作品。阿部さんいわく「これはシリーズ化すると面白そう」。ひとつのテーマで撮りつづけたシリーズ写真の例として「Follow Me(私についてきて)」という興味深い作品も教えていただきました。
撮影例04 : 藤原 まり絵(プロデュース部)
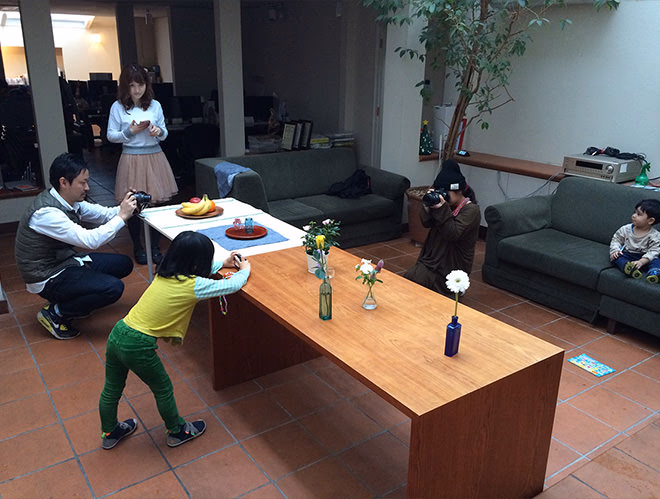
絞り値:f/2.2、シャッタースピード:1/30秒、ISO:200、露出補正:±0、焦点距離:29mm iPhone5s
私が撮影した写真です。撮り合いっこする人、手元に集中する人、そのさまを見つめる子ども、それぞれのドラマを一段高い視点から収めています。視点の高さを変えるのは新鮮味を出すのに効果的とのこと。
カメラ講座 - 初級編 -
感想と、モノサスに起きている変化
通常であれば何日もかけて学ぶような内容がぎゅっと詰まった、今回のカメラ講座。
カメラの使い方やコツ五感を働かせながら知ることで、私自身これまで「どう撮ればいいんだろう?」と迷いがちだったことがだいぶ整理されました。
そしてこのカメラ講座が、社員の家族も参加し、おとなもこどもも一緒に写真を撮り合う楽しい会になったことが何よりです。
最後に後日談を。
日めくり投稿の写真はその多くをものさす編集部が用意していましたが、カメラ講座のあと「自分で写真をとりたい!」という人が現れはじめました。
日めくり投稿をご覧いただく際は、今後は写真にも注目してみてください!そして思ったことがあれば教えていただけると、とっても嬉しいです。
私も今後、伝えたいことがピシっと伝わるように、この講座で学んだこと...構図(トリミング)・被写界深度・露出補正など意識して、積み重ねるように写真を撮っていきたいと思います。
以上、カメラ講座でした。
フジワラ
いろいろ作り物の進行管理などディレクションをしています。